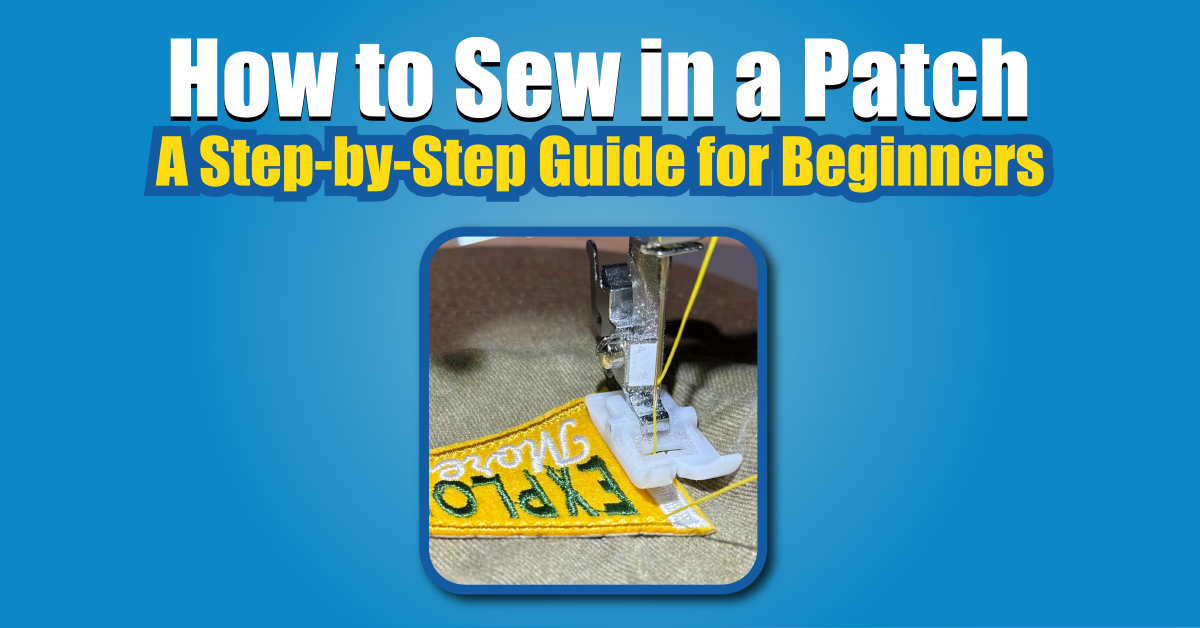
How to Sew in a Patch: A Step-by-Step Guide for Beginners
If you can sew in a patch, you can save your clothes from wear and tear, add personality to your wardrobe, and show off your accomplishments. We’ll show you how to sew in a patch with clear, easy-to-follow instructions, whether you’re fixing a hole or customizing a jacket.
Why Learn How to Sew in a Patch?
Patches aren’t just for repairing damaged clothes – they’re also a great way to express your style and increase the life of your clothes. This skill is important for these reasons:
Make your clothes wearable again by covering holes, tears, and worn-out areas.
Personalize your style: Add unique designs, logos, or patterns.
Showcase your accomplishments: Wear jackets, bags, or uniforms with badges, insignia, or symbols.
Materials you’ll need
To make patching go smoothly, gather these materials:
Custom patches, iron-ons, and sewn-ons.
You’ll need a sharp needle for woven fabrics and a ballpoint needle for knits.
Use contrasting thread or a similar color to make stitches stand out.
Using scissors, you can cut thread neatly.
A pin holds the patch in place, but it’s optional.
If you’re going through thick fabric, you’ll need a thumble to protect your fingers.
How to Sew in a Patch: Step-by-Step
Step 1: Prepare Your Patch
Make sure the patch adheres securely by ironing it on, following the manufacturer’s instructions.
Patch: Just place it on your garment where you want it.
Step 2: Put the patch on
Location: Make sure the patch is straight and centered on your garment.
Use pins to secure the patch and keep it from shifting.
Step 3: Thread the Needle
Thread: Cut a piece about 18-24 inches long.
If you want extra strength, double the thread and tie a knot at the end.
Step 4: Start Sewing
To hide the knot, start from the inside.
Pull thread evenly through the patch and fabric using a Running Stitch. Space your stitches evenly and keep them small.
To prevent fraying or loosening, sew along the patch edges.
5: Sew it all up
Knot the thread on the inside of the garment once you’ve sewn all the way around.
Get rid of any extra thread for a neat finish.
Here’s how to patch like a pro
For a clean look, use small, even stitches.
You can match thread color to patch or fabric for subtlety or contrast for boldness.
Sew around the patch twice, especially on clothing you’ll be wearing a lot.
To make sure your patch is aligned perfectly, don’t skip pinning.
Sewing patch mistakes to avoid
It leads to crooked placement if you don’t pin the patch.
Wrong needle or thread: Can damage fabric or make stitches uneven.
Tying knots too loosely can unravel threads.
Frequently Asked Questions (FAQs)
Can I sew an iron-on patch without ironing?
While iron-on patches are designed to adhere with heat, sewing them on afterward ensures durability, especially after washing.
What type of thread is best for patch sewing?
Use polyester or cotton thread that matches your fabric. Polyester is more durable and less likely to break.
How do I remove a patch?
Gently cut the stitches with small scissors or use a seam ripper to avoid damaging the fabric underneath.
Final thoughts
Knowing how to sew in a patch is a valuable, practical skill that not only repairs your clothing but also lets you express your creativity. With these simple steps and tips, you’ll be able to patch your clothes securely and stylishly. Sewing patches will become second nature with practice!