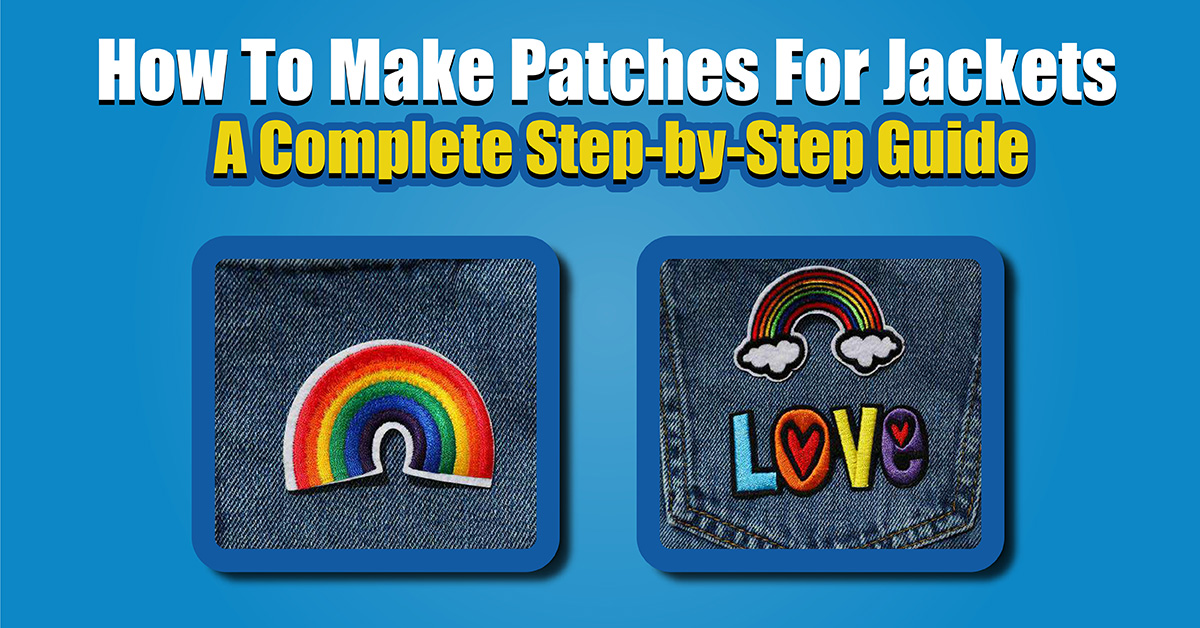
How to Make Patches for Jackets: A Complete Step-by-Step Guide
You can personalize jackets with patches, whether you’re adding flair to your wardrobe or making custom merchandise. This comprehensive guide will walk you through the entire process, whether you’re making one patch or thousands. Learn how to make high-quality patches with the step-by-step instructions below.
1. Learn how to make patches
Make sure you know what materials and techniques you’re working with before you get started. Patches can be made out of fabric, embroidery, or a combination of the two. If you want a personal touch, you can make them by hand.
Materials you’ll need to make patches:
There are a lot of fabrics out there, but cotton, denim, and twill are the most popular.
Use high-quality embroidery thread for crisp, detailed embroidery.
Pick an iron-on, sew-on, or Velcro backing depending on how you want it attached.
2. Get the materials you need
Gather the following materials to start patchmaking:
Patches made from cotton, denim, or twill will last a long time.
For vibrant, sharp designs, use high-quality embroidery thread.
Choose between iron-on, sew-on, or Velcro backing depending on how you’re going to attach the patch.
An embroidery hoop, scissors, needles, and a sewing machine are all you’ll need.
Software for graphic design (like Adobe Illustrator or Canva) or stencils for pattern-making.
3. Make your patch
A patch’s design is its heart, and it needs to be both appealing and useful. Defining your patch design is the first step. Making digital mockups is easy with software like Adobe Illustrator, Canva, or even free tools like Inkscape.
Patch Design Tips:
For better visibility, keep your design simple and bold.
Ensure your design is scalable so it looks good at different sizes.
On jackets, choose contrasting colors so the patch stands out.
4. Pick the right embroidery technique
A patch’s embroidery technique plays a huge role in adding intricate details. You can choose between the following methods based on your batch size:
It’s great for smaller batches or intricate, personalized designs.
Machine embroidery is fast and precise, so it’s perfect for larger batches.
5. Get the fabric cut and ready
Transfer your design to the fabric once you’re done. Using a stencil or printable template, you can map out the design on your fabric. For extra durability, leave a small border around the edges that you can stitch.
6. Make sure it’s durable by adding a backing
How the patch attaches to the jacket and how durable it is depends on the backing. There are advantages to each type of backing:
Backing: Heat-seal the patch to the fabric for quick and easy application.
Traditionally used for heavier jackets, sew-on backing is secure.
The Velcro backing is perfect for removable patches.
7. Finish the edges
If you want your patch to last and look polished, you’ll need to finish the edges properly. There are several ways to do this:
Put a stitch around the edges to prevent fraying and make them last longer.
You can use fabric glue to make it no-sew.
Think about merrowed or laser-cut edges for a clean, professional look.
8. Stick the patch on your jacket
You’re ready to attach your patch now. Your backing material will determine how you attach it:
Place the patch on the jacket and iron it on.
Stitch the patch on the jacket with needle and thread for a sturdy attachment.
It’s easy to remove and reattach the Velcro-backed patch.
Don’t forget to secure your patch so it lasts.
Final Thoughts
Whether you’re creating something personal or crafting branded merchandise, making patches for jackets is fun and rewarding. Here’s how you can make high-quality, durable patches that will make your jacket stand out.